


Radoslaw Zbroinski
Apr-22-2026
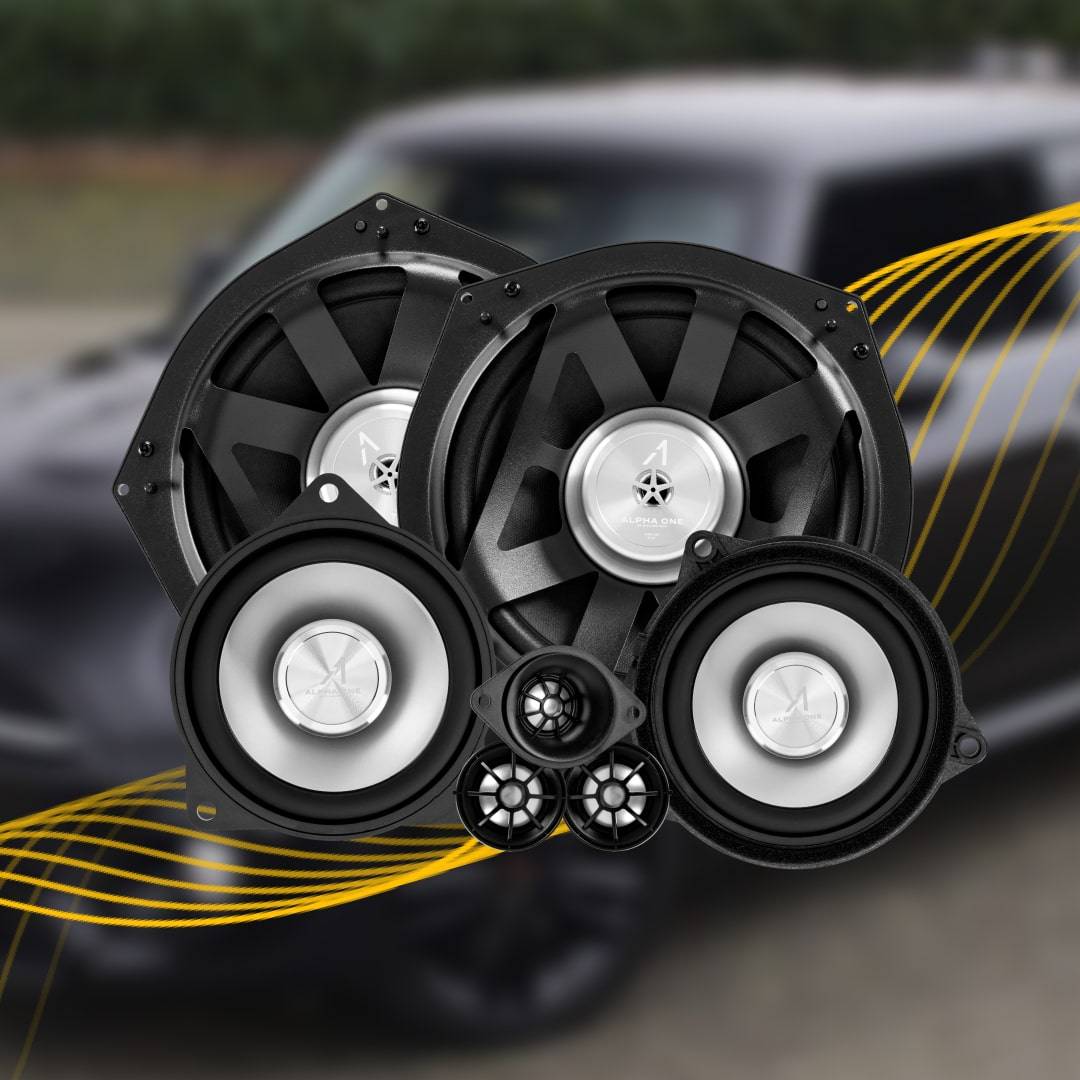
BimmerTech Alpha One Speaker Installation Guide for MINI F55
Let’s Prepare! The Tools You Will Need & Safety Tips
Step-by-Step MINI F55 Alpha One Speaker Upgrade Tutorial
Chapter I – Alpha One Front Door Midrange Speakers
Chapter II – Alpha One A-Pillar Tweeters
Chapter III – Alpha One Underseat Subwoofer
Chapter IV – Alpha One Center Dash Speakers
Chapter V – Alpha One Rear Door Speakers and Tweeters
Is the Alpha One BMW Speaker Upgrade Worth It?
If you’ve been living with your factory MINI Cooper F55 speakers, you already know they leave a lot to be desired. The good news? BimmerTech’s Alpha One Speaker Upgrade is one of the easiest and most rewarding modifications you can make to your MINI. In this guide, we’ll walk you through the full installation process – from the front door mids and A-pillar tweeters all the way to the underseat woofer and rear door speakers.
Coming up, you’ll learn:
- What tools are needed and how to prepare for the installation.
- How to install the front door midranges and A-pillar tweeters.
- How to install the underseat woofer.
- How to install the rear door speakers.
- Why upgrading your MINI Cooper F55 speakers is worth it.
If you’d also like to get a better look at all the steps, watch the video linked below.
Let’s Prepare! The Tools You Will Need & Safety Tips
You’ll be happy to learn that Alpha One BMW speakers are super easy to install! To transform the sound of your car, all you have to do is take off a few interior trim panels. Enough talk – it’s time to get started.
Here are the tools you will need for the job:
- BimmerTech Trim Tool Kit
- Torx screwdrivers (T20, T50)
- Knife
- Socket wrench
- 10 mm & 8 mm deep sockets
The whole process may take up to around 180 minutes, but it’s not difficult with the right tools. Just to be safe, we also strongly recommend disconnecting the car battery before you work on any electrical components in your car. How to do that? Simply follow the instructions below:
- Lift up the floor panel in your trunk.
- Rotate the two locking tabs 90 degrees to access the battery compartment.
- With a 10 mm socket, remove the negative battery terminal and set it aside.
PRO TIP: Wrap a towel around the latch to prevent it from locking you out if it closes.
Now onto the installation part.

Step-by-Step MINI F55 Alpha One Speaker Upgrade Tutorial
To make things easy to follow, we’ve broken this guide into separate chapters for each area of the car. We’ll start with the front door mids and tweeters, then move on to the underseat subwoofer, the center dash speakers, and finish up with the rear doors.
Also, please note that some of the cable connections shown in the video linked above might differ from what you’ll get in your speaker kit, due to updated manufacturing processes. That being said, they will be functionally identical and the same installation instructions will apply to them.
Let’s dive in!
Chapter I – Alpha One Front Door Midrange Speakers
 We’ll start with the midrange speakers in the front doors. We’ll demonstrate on the passenger side, but the driver’s side is identical.
- Remove the two T20 Torx screws at the base of the door panel.
- Using a BimmerTech trim tool and your fingers, remove the window switch cover and pull the connector out.
- Remove the single T20 Torx screw underneath the switch assembly.
- With the trim tool, remove the access panel behind the door handle and remove the single T20 Torx screw found there.
- Remove the final T20 Torx screw behind the cover on the side of the door – this one can be removed with your fingers.
- Using your hands and trim tools, pop the door panel off. It may be tight, but it is only held in with clips.
- Once free, remove the door handle cable. Create some slack on the main harness by unfeeding it through the locators, then gently set the panel down.
- Disconnect the speaker connector and remove the three T20 Torx screws holding the speaker bracket to the door.
- Remove the three T20 Torx screws holding the factory speaker to the bracket, then place the Alpha One midrange speaker onto the bracket.
- Carefully pull the vapor barrier back and tuck the factory speaker connector behind it, feeding it through the hole for the speaker. Pull it as tight as possible, then press the vapor barrier back in place.
- Plug the MINI harness into the Alpha One speaker and screw the bracket back into place.
- Reroute the harness inside the door panel, reconnect the handle cable, and snap the panel back in place.
- Replace the T20 Torx screw under the switch assembly, then reconnect and refit the switch assembly.
- Do the same with the door handle screw and panel, then replace the side screw and cover, followed by the bottom two screws.
Front door mids done, on to the tweeters!
Chapter II – Alpha One A-Pillar Tweeters
With the door panel back in place, we move on to the tweeter in the A-pillar. This step is just as straightforward, but to make panel removal easier, start with the door molding.
- Grab the door molding and pull it away from the car to remove it.
- Pull the A-pillar panel away from the car. Once the pins release, pull the panel up and out.
- Disconnect the tweeter harness. Remove the plastic pins from the panel and place them back in the trim for reassembly later.
- Carefully remove the stock tweeter by applying upward pressure on it while gently pulling back the tabs holding it in place.
- Snap the Alpha One tweeter into place and tidy up the wiring.
- To reinstall: plug the tweeter in, ensure the plastic pins are back in position, snap the A-pillar trim back in place, and stick the molding back on.
PRO TIP: Make sure the plastic pins are properly seated in the trim before snapping the A-pillar panel back in – this ensures a rattle-free fit.
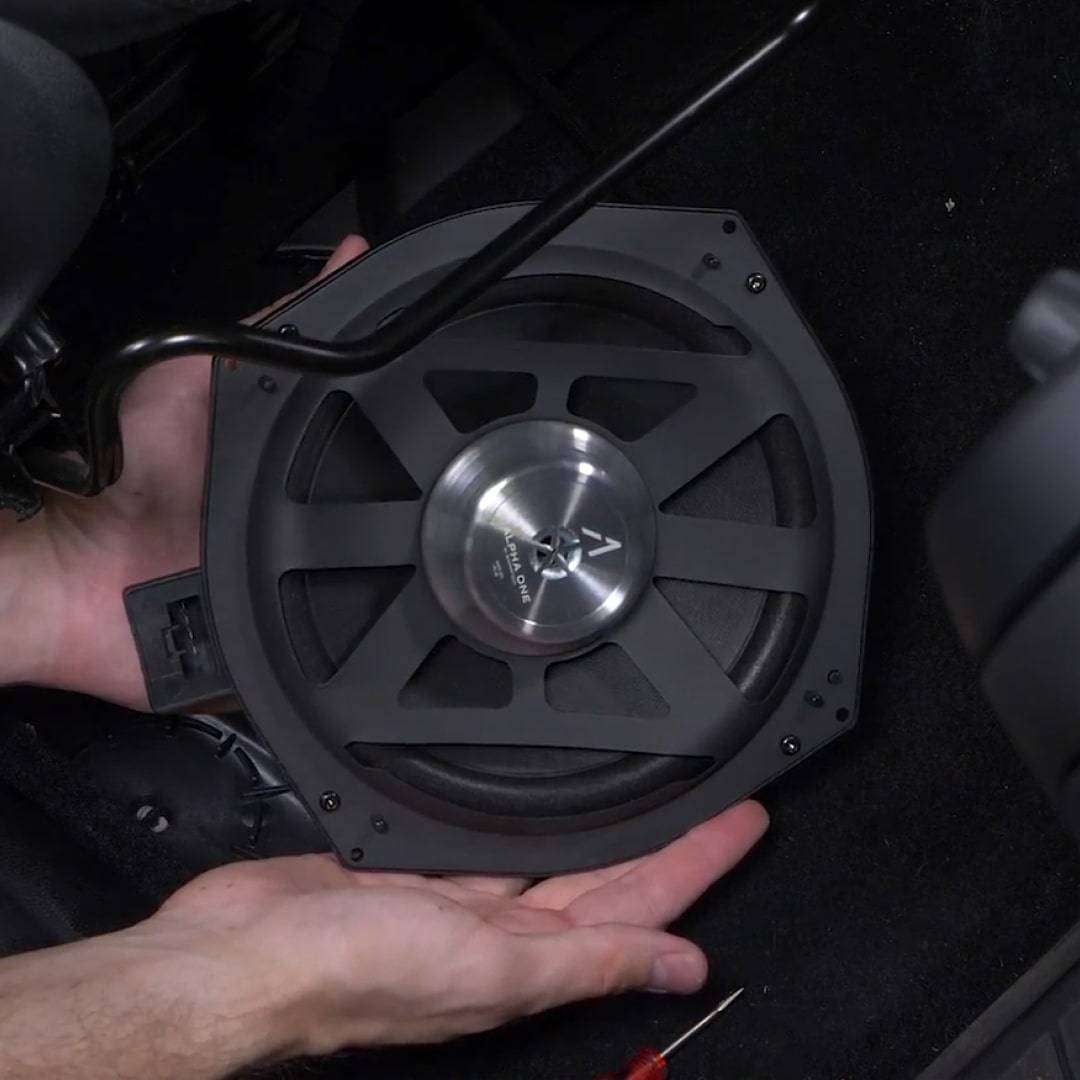
Chapter III – Alpha One Underseat Subwoofer
With the front speakers complete, the last step up front is the underseat subwoofer. You’ll need to move the front seat out of the way to access it.
|
IMPORTANT! |
|
Before starting this step, briefly reconnect the battery if you have power seats. This allows you to reposition the seat electronically to give you the best access to the subwoofer bolts. Disconnect the battery again once the seat is in position. |
- Using a T50 Torx bit and ratchet, remove the four bolts holding the seat in place.
- Move the seat as needed to expose the subwoofer grille.
- Tilt the seat back to fully expose the grille, then remove the four T20 Torx screws holding it in place. A 90-degree tool may be necessary depending on available clearance.
- Once the grille is off, remove the four silver T20 Torx screws holding the subwoofer down.
- Use a small screwdriver to gently pry the speaker up, then unplug the connector.
- Plug in the Alpha One subwoofer and reinstall all screws and the grille in reverse order.
- Lower the seat back into position and re-tighten all four T50 Torx bolts.
Chapter IV – Alpha One Center Dash Speakers
With the front installation complete, we move on to the center speakers in the dashboard. This section involves both a tweeter and a midrange speaker, along with a crossover.
- Remove the speaker cover from the center dash area.
- Remove the T20 Torx screws holding both the tweeter and midrange speaker in place.
- Disconnect both speakers.
- Install the new Alpha One tweeter first, securing it in place.
- Add the crossover, plugging it into both the Alpha One midrange speaker and the factory harness.
- Secure the midrange speaker in place.
- Put the grille back in place.
PRO TIP: Use the provided twist ties to keep the crossover cables neat and prevent any rattling behind the grille.
Chapter V – Alpha One Rear Door Speakers and Tweeters
The rear door installation is similar to the front. With the trim removal technique already familiar, this should go smoothly.
- Using a pry tool, remove the access cover on the door panel to reveal a T20 Torx screw. Remove it.
- Pry off the window switch panel and unplug the connector – this gives you access to another T20 Torx screw. Remove it.
- Remove the final T20 Torx screw at the bottom of the door panel, then begin prying the panel away from the door.
- Once the panel is off, disconnect the door latch and pop out any remaining cabling connected to the door.
- Note that the tweeter in the rear door is connected directly to the midrange. Unplug it, remove all remaining cabling, and set the door panel aside.
- Disconnect the main speaker harness and remove the three T20 Torx screws holding the factory speaker in place.
- Connect the crossover cable to the main harness – the longer cable, labeled “mid-range,” plugs into the new Alpha One speaker.
- Note the small notch on the outer edge of the speaker where the cable feeds through when securing it back in place.
- Screw the speaker back in and dress the cables neatly on the door.
- Using a small pry tool, work gently around the edges of the tweeter, prying at the clips while keeping tension on the cable end. This ensures the tweeter pops out cleanly.
- Snap the Alpha One tweeter into place.
- With the cables dressed and out of the way, place the door panel back on, working in reverse order.
- Plug everything back in and replace all cable clips, making sure the tweeter connection is secure.
- Reattach the door latch cable and realign it.
- Carefully line up the door pins and clip the panel back into place.
- Replace all T20 Torx screws, refit the covers, reconnect the window switch, and snap it back in place.
Is the Alpha One BMW Speaker Upgrade Worth It?
Absolutely – and if you’ve made it this far, you already know why. The Alpha One speaker system transforms the audio experience in your MINI F55 from factory-bland to genuinely impressive, with richer mids, crisp highs, and real bass from the underseat sub. And as you can see from this guide, the installation process is designed to be accessible even for first-time DIYers.
For the best results, consider pairing these Speakers with the Alpha One BMW Amplifier as well. Hungry for more information? Feel free to reach out – our sales team will be happy to advise you on the best possible audio solution for your MINI or BMW.
Comments(0)
All ratings
Popular posts:


and get to know all compatible products for your BMW or MINI
Where to find your VIN?


