


[[post.title]]
We're changing for you!
Check out our new website ![]()
We're changing for you!
Check out our new website ![]()
BMW Original Parts
Search by VIN
Search by VIN
Feb 21, 2025

For most of us, the interior of our car is one of the first things we see in the morning and what we first see after a long day at work. At either of those times, do you want to get into something unsatisfying? Or worse… Do you want your friends or family to do so? Of course not – a clean car is a happy car and a happy car is a happy you! While that might be a bit of an exaggeration, it’s good to keep the inside of your car clean.
Car interior cleaning not only keeps your car looking and smelling good, but it will also:
Regardless of what your reason is to keep your car tidy, here is an in-depth 10-step guide on how to make sure it really is clean! Along the way, I’ll try to cram in as many useful tips and tricks as possible, so don’t miss them.
It is important to note that cleaning the interior of a car does need some special care. Obviously, you can’t just dump in some bleach and call it a day. There are many different surfaces you’ll need to give some special attention to: glass, plastic, carpet, leather (or whatever your seats are made out of), and more.

Before we get into all the details later on, I want to stress here the importance of clean glass! Streaks, smears, and other gross happenings with your glass (windshield, side windows, AND rear glass) make it harder to see, and harder to see is not good.
You’ll also need to note what type of surfaces you have: polished stainless steel and mirrored plastic finishes can scratch if you clean them the wrong way. Also, don’t use damaged tools or dirty towels as they can scratch, rip, and otherwise damage your interior.
I hope I didn’t scare you, but that’s all stuff you need to know. Now that you do, let’s get to it!
If you’re here, chances are you have a BMW (if you don’t, don’t worry, as all of this applies to you too). You might want to know what are the best BMW cleaning products out there? Well, unfortunately, this is not a one-size-fits-all answer, but there are some things worth looking out for.
First thing’s first, make sure you have the right car interior cleaning products for the job. Glass cleaners are for glass, leather cleaners for leather, and so on. While it may seem obvious, there are some people who skip these steps, and end up doing damage to their seats or trim.
Keep in mind that you don’t need the most professional car interior cleaning products! Generally speaking, stuff you can get at your local store should be perfect and is probably what the professionals are using anyway. Just try avoiding the lowest-quality cleaning products – other than that, you’ll be good to go.
In addition to the right cleaners, make sure you have the right thighs to use them with. CLEAN microfiber towels are key. They will pull away moisture and debris. However, they will also hold debris and scratch some surfaces, so when you are done with one, throw it in the wash.
If you are using things like vacuums, steam cleaners, and things like that, make sure they are working and in good shape, especially if you are using one at a place such as a public carwash. A vacuum there could have something stuck in the nozzle, and that could be a bad day for your seats.
You also might want to consider wearing gloves when cleaning your interior. Not only will it protect your hands from potentially risky cleaning chemicals, it will also prevent any oil or sweat from your hands getting back on to your clean surfaces. You don’t want that, especially when it comes to glass surfaces or gloss black trim!
Now that we have covered most of the basics, let’s get to some of the actual steps to cleaning your interior. While some of these may seem pretty basic and perhaps just common sense, it’s worth going over each of them. After all, if it saves just one interior, wasn't it worth it?
Let’s face it: trash is one the most unsightly things in the interior of a vehicle. How long has that three quarters finished water bottle been sitting in your back seat? Or how long has this Starbucks receipt been sitting in your cup holder, instead of the very same water bottle? Mhmm… That’s what we thought.
THROW IT OUT!
Anything that holds liquid can leak causing a bigger mess and potential damage. Rubbers, some plastics, or candies can melt and be a nightmare to clean. Food waste, on the other hand, can lead to mold and unwanted guests in the form of critters.
Last but not least, trash can be dangerous. No kidding!
Remember that water bottle? If it rolls under your brake pedal or pins your accelerator down, you’re in trouble. And while it’s a bit more far-fetched (or “creative” scenario), if you open a window, any loose papers could fly around your cabin, getting into your line of sight. Or flying out of said window and getting in the line of sight of another driver. Potentially leading to road rage.
…So, if you want to avoid road rage – just take out the trash!
How many of us have just vacuumed out the floor mats without taking them out? Or worse, brushed off the mat and swept anything that was on it UNDER the mat to not have to see it? Yeah… Let’s not do that again, even if there’s no vacuum at hand.
Remember: mats or rugs are designed to protect your floor, so instead of asking yourself how much is car interior cleaning, ask how much it might be to replace your carpeting if you don’t take care of it! Rocks and other items trapped under your mat can wear out your floor lining over time, and you don’t want that.
Go the extra step and clean what you can’t see – trust me, you’ll be glad that you did!
Did you even notice your dashboard’s color getting a little lighter over time?
Sure, it could be sun damage, but it’s likely just a thick layer of dust and dirt. No matter how much you try to keep your interior clean, we don’t think about this area too much since it’s never something we actually interact with, even though we look at it ALL THE TIME! Taking a quality car interior cleaning spray designed for the material of your dash (vinyl, plastic, leather, and so on) and a clean microfiber towel will work wonders.
To get rid of it, simply follow this procedure:
IMPORTANT! Never press on the dash too hard for a couple reasons: one, you don’t want what you’re trying to be cleaning up pressed in your dash. You want to lift the dust away, not push it in. Additionally, dashboards can get brittle over time, especially if they are plastic, aging, and kept outside. You don’t want to crack it by applying excessive pressure.
Since we’re going to be talking about cleaning the windshield next, you might want to cover that dash you just cleaned with a rug or something. Your glass cleaner might not mix well with the dash cleaner you just used. While we’re not talking about a toxic gas situation, you might get some unsightly marks on your dash that you may have to clean again… or be left with forever.
Windshields and windows can get grimey and full of fingerprints. To tackle the insides of these, you’ll need:
Now, there is a bit more to it than just spraying the cleaner on and wiping it off. For the best, streak-free effects, go by the following procedure:
| PRO TIPS |
| Why are we mentioning degreasing so much? Plastic and vinyl surfaces in your car are prone to what’s known as “offgassing.” It’s when they release compounds responsible for creating an oily film on your windshield as a result of being subjected to high temperatures. This may or may not be applicable to your case, depending on how often your car sits in the sun. Nevertheless, greasy stains can come from various sources, so it’s always good to incorporate ways of eliminating them into your cleanup routine. |
Another good method is one that Larry with Ammo NYC uses, which is to spray your cleaner on and use a squeegee to clean the glass. I will admit that your writer has not mastered this method yet, but the results in the good areas are phenomenal.
Last tip is to be careful with tint and your defrost elements on your rear window. Tint can be negatively responsive to harsh cleaners, so make sure what you get is tint-safe and be extra careful when cleaning. As for the defrost elements, don’t use too much pressure and try to go “with the grain,” instead of working against them. If you break one (which is hard to do thankfully), it’s no fun.
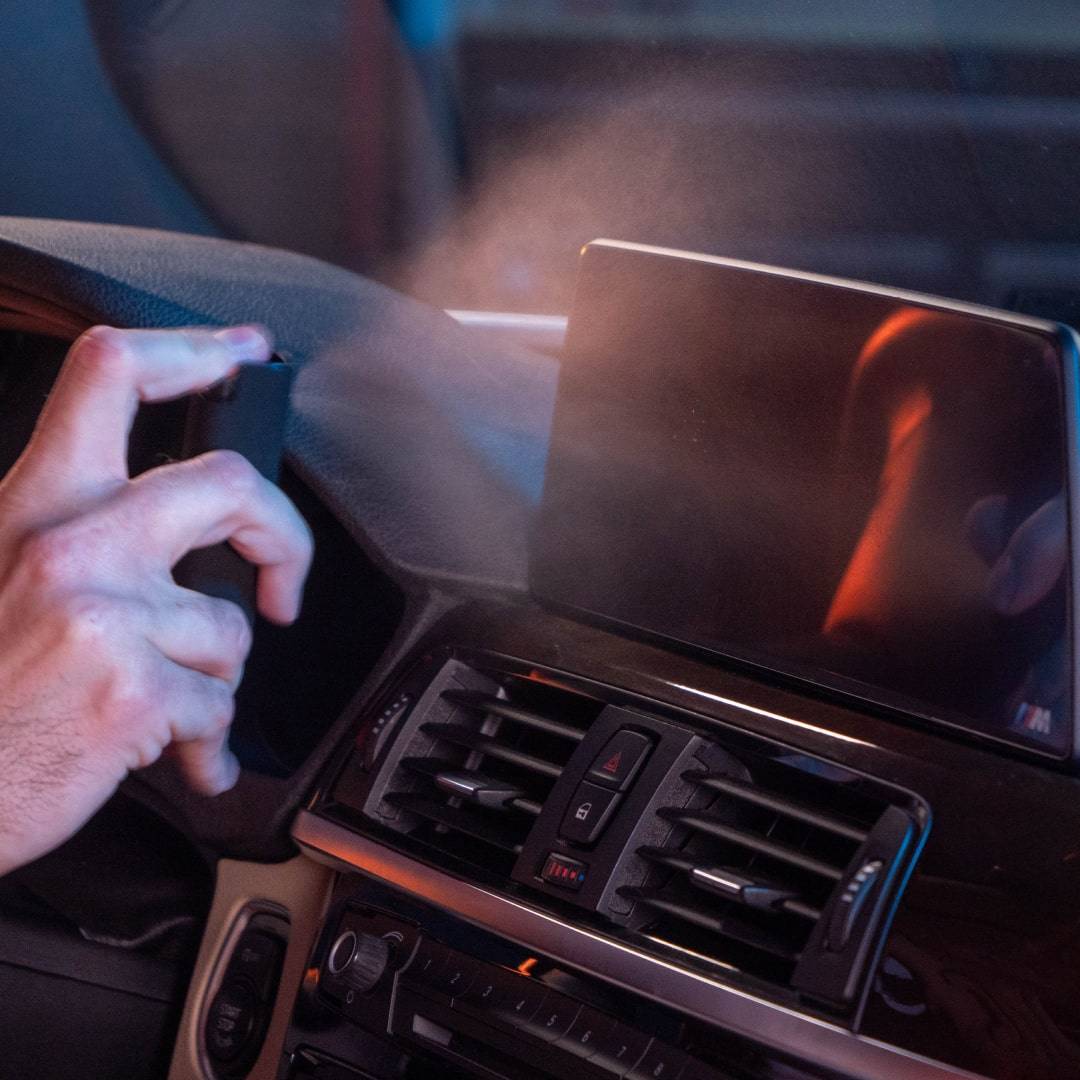 Since this is a site mostly for BMWs, I’m going to focus a bit more on screens for our Bavarian brethren, but this will apply to most cars with an infotainment screen. As we all know for modern BMWs, the iDrive screen is everything: entertainment, important information about the vehicle, navigation, and more.
A dirty screen is no fun. While we have a whole article going over the best ways for in-car screen cleaning, a dirty screen makes it harder to see (which is dangerous), makes it harder to use if it’s a touchscreen, the oils and grease can heat up and break down over time which could damage your screen, and so on.
You’ll want a dedicated cleaner and you’ll clean it the similar way you would glass, but I strongly suggest getting a specific screen cleaner instead of just a glass cleaner. A glass cleaner may be too harsh for certain screens and they may not be formulated to work most efficiently on something that is touched over and over again.
The BimmerTech Car Screen Cleaner is an all-in-one solution. You spray it on and use the body of the cleaner—made of microfiber cloth—to gently wipe the spray off. You can always use a microfiber towel too if you choose to. Not to be TOO much of a salesman right now, but once your BMW’s screen is cleaned, you might want to protect it with our BMW Protective Glass, also available right on our site! Okay, okay… I’m done… For now…!
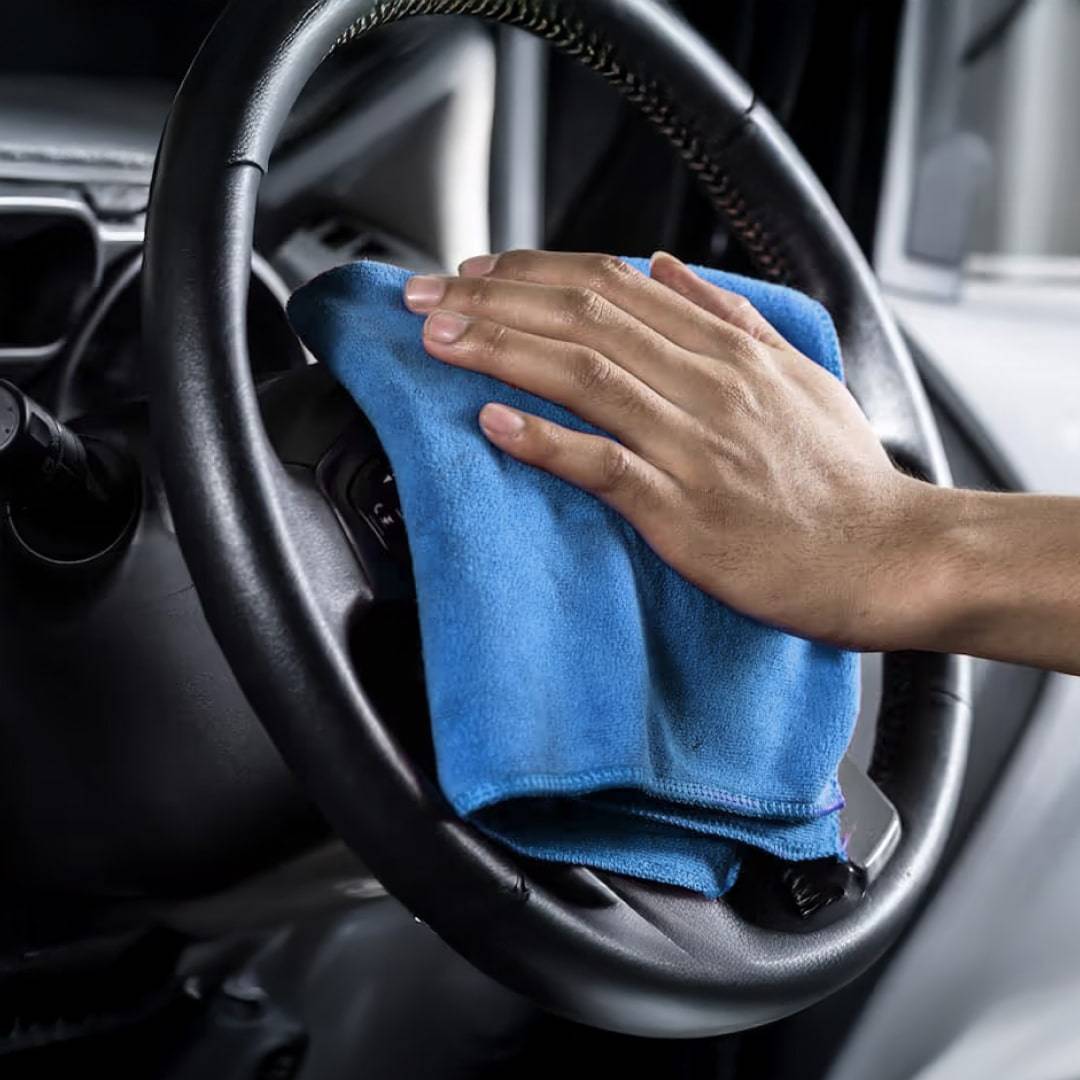
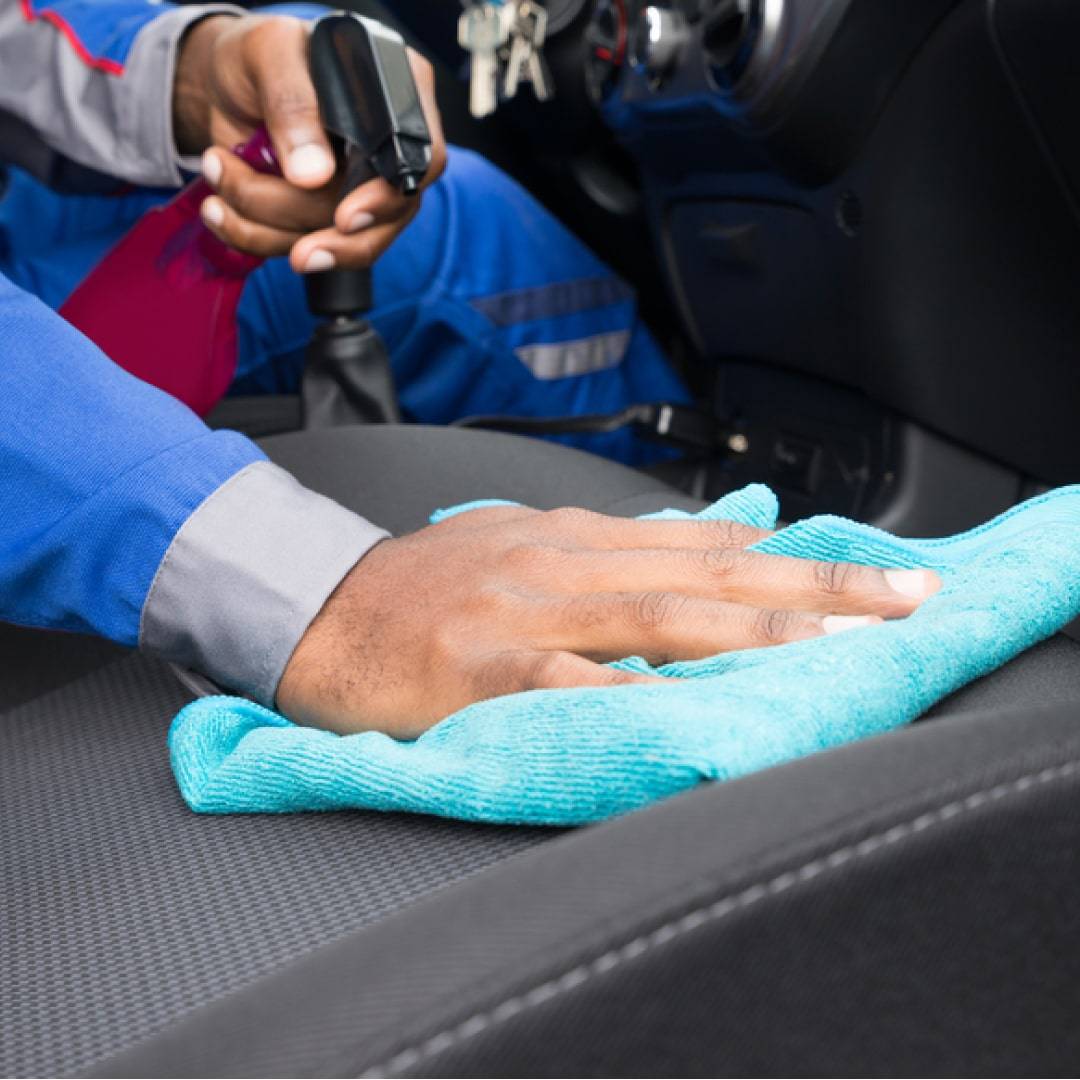
Trim pieces are everywhere in your car and they are all made of different things. If you have a newer BMW, take a look at your door. You probably have metal, plastic, and leather all on one panel. How do you go about cleaning all of this!? Generally a good car interior cleaning spray will do the trick. Despite all of those different materials, you really don’t need a full car interior cleaning kit for all of it.
For most hard surfaces (plastic and metal), you can spray them down with an interior cleaner and gently wipe them down with a clean microfiber towel. Just remember that gloss surfaces are easier to scratch, so be gentle, don’t apply too much pressure, and flip your towel to a clean side for each pass or new trim piece.
For your leather and soft touch materials, you might want to use a cleaner designed for those materials. You want something that will both clean and rehydrate them. If you use a cleaner that will dry them out and let them stay dry, they will start to shrink and get hard, which will lead them to cracking. You CAN use a “normal” cleaner on them in a pinch, but make sure you use a product after to rehydrate the trim.
Don’t use a cleaner that’s too aggressive or scrub too hard on leather surfaces, because you may start to remove the dye, which will lead to unsightly discoloration. This is especially important if you have a leather steering wheel, since this is a “highly trafficked” area.
 You sit in these every day. Add kids or pets to the mix and you’re in even more trouble. This is the one time I may suggest professional car interior cleaning since often some deeper car interior cleaning needs to be done. Best bet is to stay on top of your seats with a vacuum that’s in good shape, clean, and not damaged.
Leather or vinyl seats are thankfully a bit easier to clean. Get a leather or vinyl cleaner, and go to work. Just remember what we talked about with the trim in the last section: don’t apply too much pressure, and rehydrate!
Cloth seats… Ehhh… Harder. You can spot clean a stain with a car interior cleaning shampoo, but if your seats are dirty, you’ll see one random clean spot. You’ll also realize, yes… Your seat is dirty after you clean that one spot, even though you didn’t think they were. If you do wet your cloth seats, make sure you allow them to dry!
This one is easy… Don’t. I do NOT suggest cleaning your headliner.
Correction: I advise doing it with EXTREME caution. Headliners are generally made of soft, thin material. For higher end BMWs, they might even be made out of a fancier material since that looks more luxurious and they can get away with it since it’s not supposed to be touched.
Additionally, your roof heats up when outside in the sun and cools down inside or in the winter. That is already putting stress on the glue holding the headliner in place. Like when us humans age, gravity shows its strength when things get old. From the moment your car was made, gravity wants to pull that headliner down. Glue holds it up.
Anything you use to clean it or even the oils in your skin touching it could degrade the bond between the headliner and the glue. That’s why it’s so crucial to use VERY gentle cleaning methods. For example: try gently wiping any dirt off with a dry cloth. If the stain is stubborn, a dedicated headliner cleaning solution might do the trick. To ensure maximum “safety,” apply it with a soft brush and pat it dry, instead of wiping it off.
Not sure your skills are up to the task? Well… Just… Don’t… Touch… It!
While I talked about it a little with the mats and seats, a vacuum is honestly your best friend. A good vacuum with the right attachments will work wonders on your seats, floors, and floor mats. Take the mats out, vacuum them, and then the floor. You’ll be amazed at how much doing this alone can transform your car.
If you have a lot of built up dirt in your mats, agitate the fibers of the mat with a car interior cleaning brush for carpets (they will be bigger and a bit stiffer) to loosen everything up, then hit it with the vacuum.
As long as the vacuum and what you are vacuuming is not damaged, this is easy, fast, and very satisfying. Let me stress the fact that public vacuum cleaners are something to beware, so before you start vacuuming the interior of your car, check out if there isn’t anything stuck in the nozzle. Yup, this happened to one of our BimmerTech colleagues…
While this isn’t exactly “cleaning,” a good air freshener is a satisfying last step.
Of course, you might want to remove any bad smells first (old spare shoes in the back, open food containers, the 17-year-old family dog…) for the best results. I would suggest a car specific air freshener. The spray ones for your home may not fare well with certain trim pieces. Beyond that… It’s just an air freshener!
Now that you know how to clean… KEEP IT CLEAN! Cleaning does take time and effort, but it will take a lot less time and effort next time if you prevent it all from happening. Clean as you go, don’t eat in your car, tap your feet off before getting in, and so on.
Also products like seat covers, larger or rubber/all weather floor mats, and our BMW Protective Glass (and Tesla screen protectors) will help keep your vehicle from being damaged by this dirt and debris.
We hope this helped you on your journey to keeping your BMW clean! Don’t forget to check out our YouTube channel for other helpful maintenance and DIY focused videos for BMW, MINI, Supra, and Tesla.
![]() Customer Reviews
Customer Reviews
Comments
Rate the product
This email is already registered.
Please Log In to continue.
Let us find
the right version for you
We'll confirm pricing, compatibility and product details for your car:
Enter your VIN![]() Customer Reviews
Customer Reviews
Comments
Rate the product
This email is already registered.
Please Log In to continue.
[[comment.name]]
[[comment.text|raw]]
BimmerTech
Newsletter
[[comment.name]]
[[comment.text|raw]]
BimmerTech